


A Guide to Setting Up Google Analytics for WordPress
Google Analytics is a versatile reporting and tracking system that turns out valuable data regarding the performance of your website. Launched in 2005, it is an easily operable system, even for beginners. It also has many advanced features that can help with the creation of complex reports, track visitors’ movement paths through the site, and monitor conversions of goals you set at specific intervals. The service is free, although a premium option is also available for advanced users and corporations.
The benefits of Google Analytics
The data received through Google Analytics provides in-depth knowledge regarding the various performance aspects of your website. Through these reports, you can track the performing and non-performing areas also. You can track marketing campaigns, integrate Google Adsense and Adwords to see reports regarding revenues earnings site-wide. You can also track e-commerce dealings, campaigns and keywords to identify the best revenue sources.
Google Analytics account
The first step of using Google Analytics is to create an account on the Google Analytics website. You need to sign up with your existing Google account and start creating a new account there. Be sure to enter your account name, website name and URL address in the requisite fields. Then you need to select the “Data Sharing Settings” at the bottom of the displayed page. By default, all four types of data are selected. Click on “Get Tracking Id” to proceed to the next phase.
In this context, you may also configure the “User Management” tab in the Admin area. Here, you may set up accessibility options for different users of your website with regards to Google Analytics reports. There are four permissions available – ‘Edit’, ‘Collaborate’, “Manage Users” and “Read and Analyze”. In this page, you will also be able to view all the webpages where you have enabled in Google Analytics reporting.
Tracking code
Agree to Google’s “Terms of Service” page for continuing to the next page. You will get the tracking id here. It will start with the prefix ‘UA’. You need to copy this code and come back to your website. In your website’s Google Analytics Settings Tab, copy this code to the “Tracking Id” text box and click on “Save Settings”. This will link your website to the Google Analytics site and enable exchange and processing of data between them.
Adding Google Analytics to WordPress
After creating your WordPress website, the next step of setting up Google Analytics is to add the tracking id to your WordPress site’s pages. There are three ways of achieving this integration:
- Manually enter the JavaScript tracking id before the closing <head> tag of your webpage. Repeat this for every page of your website or you may track selective pages in this manner.
- In most regular WordPress themes, you may create a child theme and add the tracking id in the header.php file, in the same position as the manual entry (discussed above). More advanced and premium themes have a separate place of entering the tracking id in the Settings menu.
- Use a plugin for Google Analytics and configure the “Web Property” tab by putting the tracking id there.
![]()
Google Analytics currently uses asynchronous loading to ensure the faster processing of webpages and not affecting page loading speeds. This mode ensures that the tracking code executes only after the entire page is loaded in the user’s system.
Now that Google Analytics has started functioning for your website, you need to wait for 12 to 24 hours, depending on your website’s traffic, for report generation.
Different reports in Google Analytics
The ‘reports’ area of Google Analytics provides access to the different aspects based on the data collected from your website. These reports are generated from the date of installation of Google Analytics only. There are several categories in the ‘reports’ section:
Dashboards
This section allows users to display any report from a large number of pre-made reports generated by Google Analytics. There are two sections – Blank Canvas and Starter Dashboard. You may create your own kind of reports in the Blank Canvas section. The starter dashboard is the area where you may preview the various reports available.
Shortcuts
As the name suggests, this option allows creating links with the reports you use on a frequent basis. The menu displayed at the top of every Google Analytics report has this option where you may add a ‘shortcut’ of the same. From this menu, you may also email the report as an attachment or save it in different downloadable formats.
Intelligence events
This option allows you to track daily, weekly or monthly occurrences as per your choice. These trackable events include clicks, visits, page views, sales conversions, bounce rates and so on. This page allows the creation of alerts also, which may be applied in general to all traffic or upon specific criteria fulfillment. You may choose an alert parameter among a number of them provided, with the freedom to set up the value of the alert triggering. These alerts may also be received through email.
Real time
This section generates reports involving the visitors currently accessing the website. The default ‘Overview’ page shows the number of live visitors with graphs available for per second and minute views for the last half an hour. Most visited pages and referrals, top social traffic and content are also displayed in this section.
Audience
You will find over twelve different reports in this section. Audience reports include analysis on visitor demographics, location and the platform used for viewing your website. This section is important for determining the type of customers who are interested in your website.
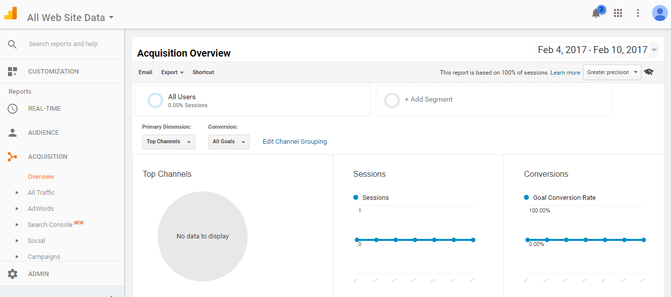
Acquisition
This section provides information about the origins of the people visiting your website. The reports include data about referrals, channels, paid and organic search engine traffic, along with a comprehensive breakdown of social media traffic to your website.
Behavior
The behavior section lets you know the activities of the user upon their visit to your website. These include the user’s site searches, landing pages and exit pages. This provides valuable data about the user’s preferences in the website over a period of time.
Conversions
This section offers valuable e-commerce reports regarding product and sales performance of the website. It can also track transaction speed and purchase time of the user. The conversion page may also be used for advanced reports like Goal Creation and Monitoring.
Thus, you can now install Google Analytics on your WordPress website, monitor its performance and formulate strategies and tactics for your website’s improvement with proper data analysis.
Your thoughts?
How has Google Analytics helped you improve your website? Did you use it to learn anything about your website that you didn’t expect? Share your thoughts in the comments.


The post A Guide to Setting Up Google Analytics for WordPress appeared first on GetResponse Blog – Online Marketing Tips.
What Business Stars Say About Jon Flatt:

“I have witnessed firsthand Jon`s unique ability to lead and build a company from the ground up. He has a proven track record to create technology, operations and company vision based on identifying early adopter trends in the market place”, VP , Circuit of the Americas

“Jon Flatt is a true entrepreneur and pioneer in the fast growing world of online advertising. His philosophies on innovation and business operations in the new economy have proven to be very successful.”, Billionaire and former owner of , The Minnesota Vikings

“Jon has an uncanny ability to quickly understand very complex issues and come up with effective scaleable solutions. His abilities as a problem solver are among the best I have ever experienced”, CEO , Verdant Frontiers

“Jon Flatt is a visionary who has the unique ability to identify early adopter trends in online advertising and more importantly, develop and execute strategies to capitalize upon those trends.”, Partner , McCombs Enterprises

“Jon Flatt builds and leads profitable, highly successful, and rapid growth companies. He is able to focus on mentoring excellent leadership teams, attracting top talent, and gaining employee loyalty during an intense high growth revenue stage. Having worked as CFO for Jon's previous company, Lin Digital, I was able to see first hand his razor sharp focus on building a highly profitable business with an end goal to produce company, employee and shareholder returns.”, CFO , Nfluient

“With almost two decades of experience in digital advertising sales, business operations, and as a publisher, Jon brings a level of combined expertise not seen often in the digital space. Leveraging owned and paid assets for revenue and sales is tough. Building a business from that success is even more difficult. Few people exist that can help you accomplish those types of goals. Jon is one of them. ”, Director, Business Development , Varick Media Management

“Jon Flatt is a true visionary in the digital space. He's a born entrepreneur, leader, and always has his finger on the pulse of "whats next".”, Regional Account Executive , LIN Digital

“If you are looking to improve your company culture, attract the best talent and position your company for maximum growth, you need to be talking to Jon. Early on in the digital World, Jon realized that tech is an important component in the Red McCombs Media value proposition and while service is key, a tech platform would position the company far beyond competitors. He conceptualized and created RedZone, a platform that streamlines internal workflow that competitors are still trying to replicate in 2016 and gives full, real-time data access to agency clients and brands beyond the limitations of a DSP or an ad server. This is just one of many things that made Red McCombs Media attractive to bidders and led to the purchase of Red McCombs Media by LIN Media. With the powerful combination of tech and service touted by LIN Media, they were purchased by Media General, who was then purchased by NexStar. All of these companies achieved great success as a result of Jon’s early work…work which has withstood the test of time.”, regional account lead , Centro